For this week's craft post I thought I would show you a quick and easy way to add belt loops to your pants. If you remember THIS POST I received some really cute pants from Stitch Fix. I loved everything about them except for the fact that they didn't have belt loops. I received several great suggestions from my readers of how to fix them. In the end, I decided to add my own belts the quickest and easiest way I knew how by using a $2.00 package of bias tape. Watch the short two minute video below before looking at the "How To" photo tutorial.
Before I begin, I'm going to take some time to explain what Bias Tape is for the non-sewer. Bias Tape is a finishing fabric edge usually used on quilts, but you also see it used to give a finished edge on clothing. Many seamstress make their own bias tape. This is done by cutting the fabric on "the bias" so that it has some stretch to easily go around corners and edges. Bias tape is available in many colors and styles at all fabric stores and any wear fabric is sold like Hobby Lobby and Walmart. The bias tape I used is a "double fold" bias tape.
Finding an exact color match to the pants is impossible, but I thought I came pretty close. The first picture is closest to the true color of the bias tape. Some of the other photos the tape looks more light green than blue.

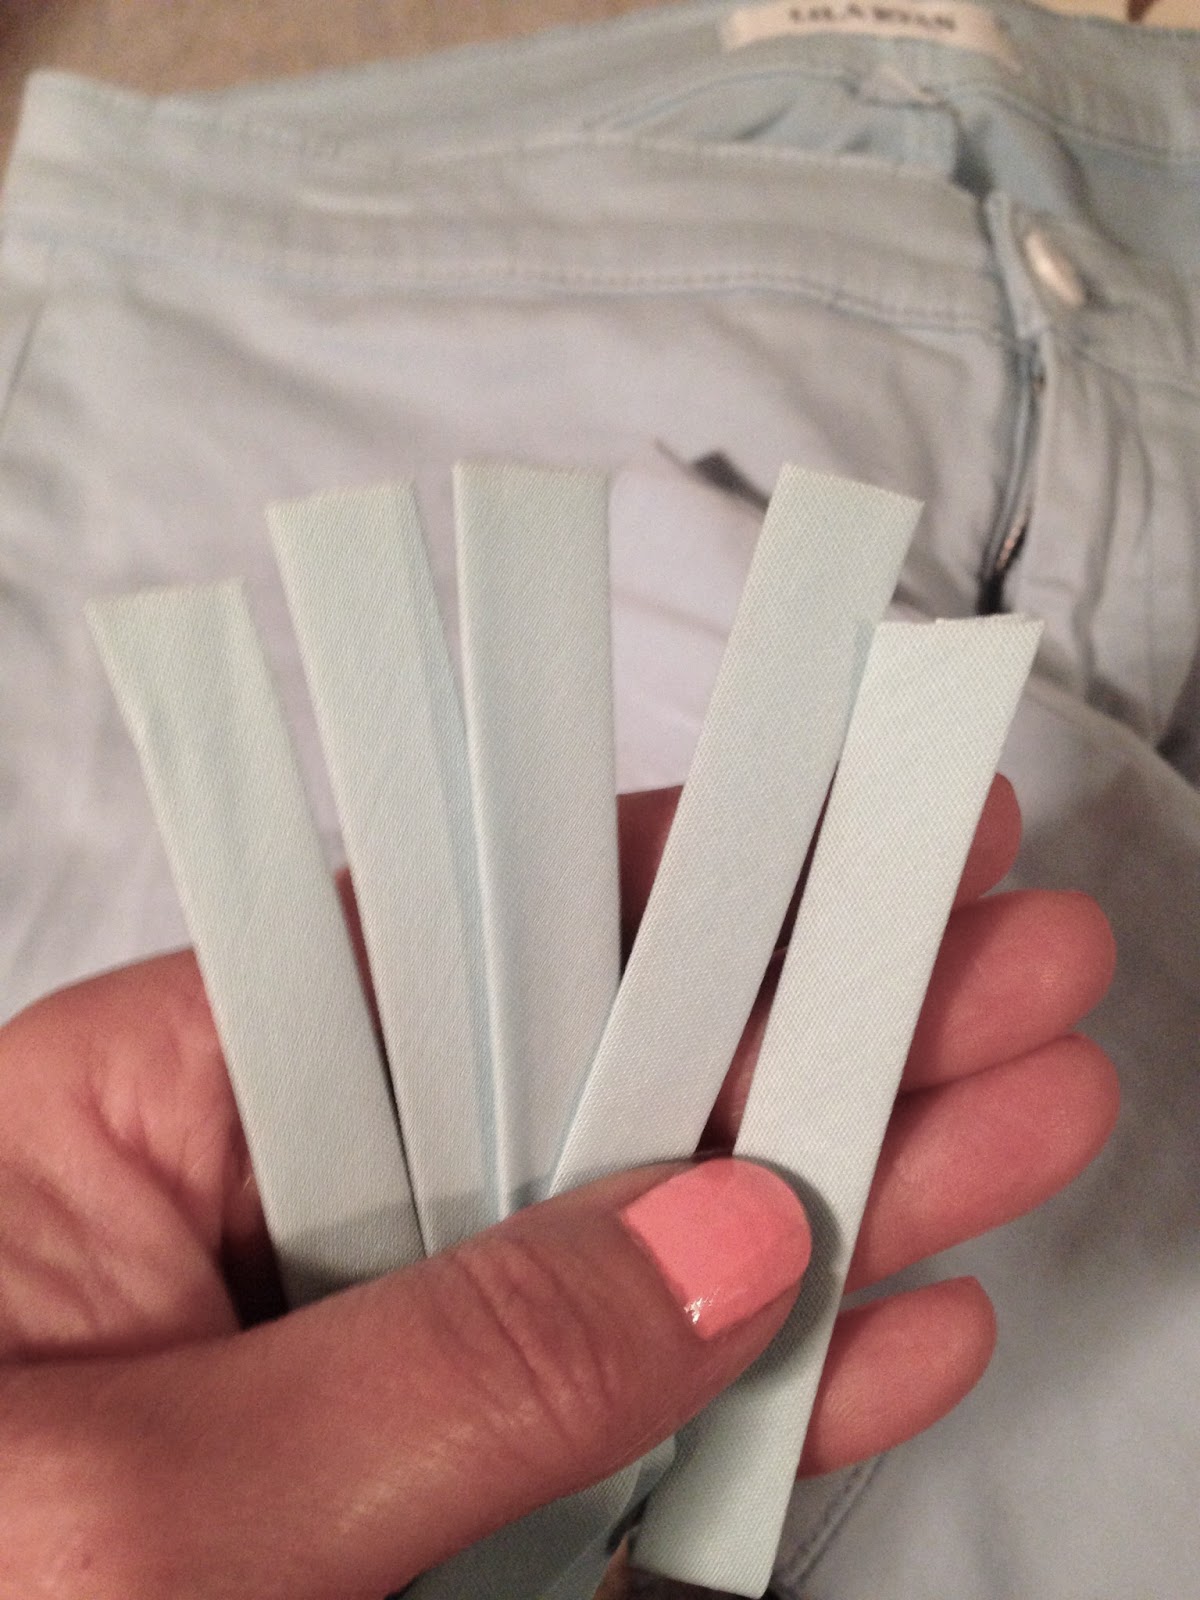
The first thing I did was measure and count the loops on another pair of pants. In this case, I used a coral pair of pants I received in my June Stitch Fix box. I then cut five strips of bias tape and sewed the long open edge shut.

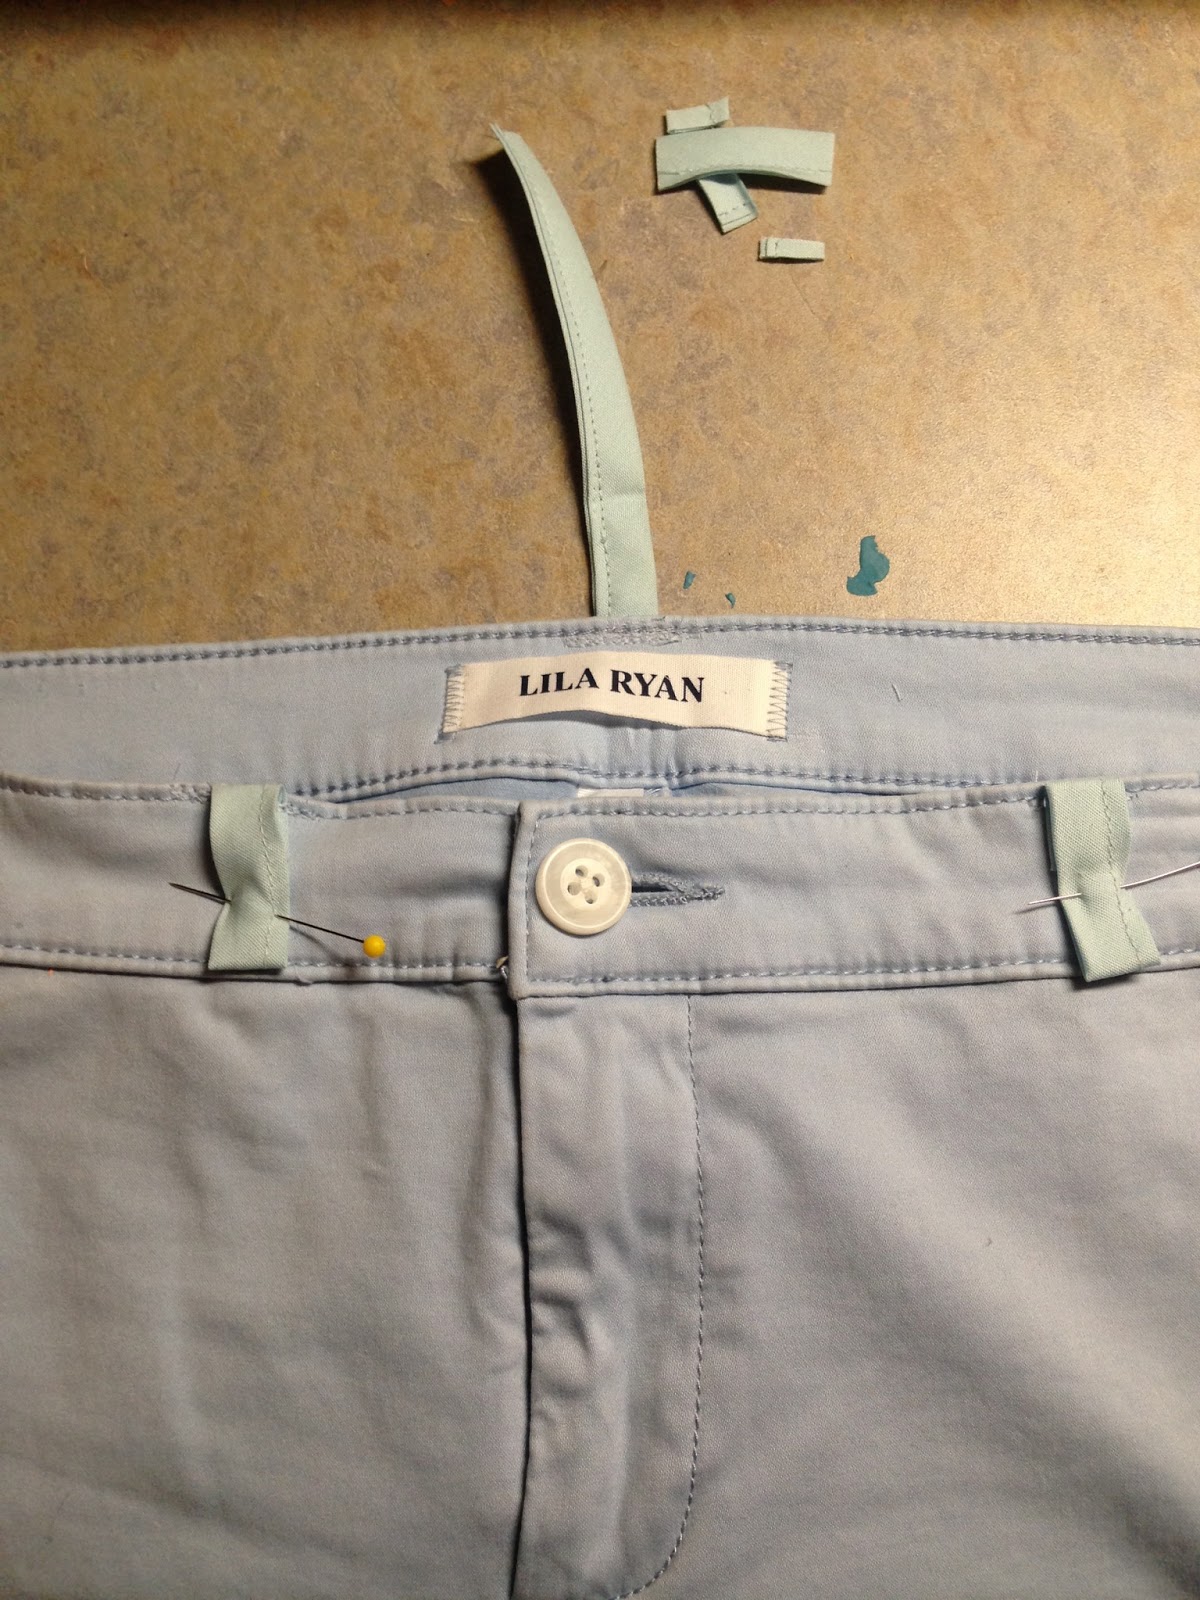
Next, using my coral pants as my guide, I pinned one end of the bias tape to the pants.

I repeated this five times.

I then sewed the bias tape on using the existing top finishing as my guide. I went back and forth around 4 times to make sure the loop would stay on and tear if I tugged up my pants.

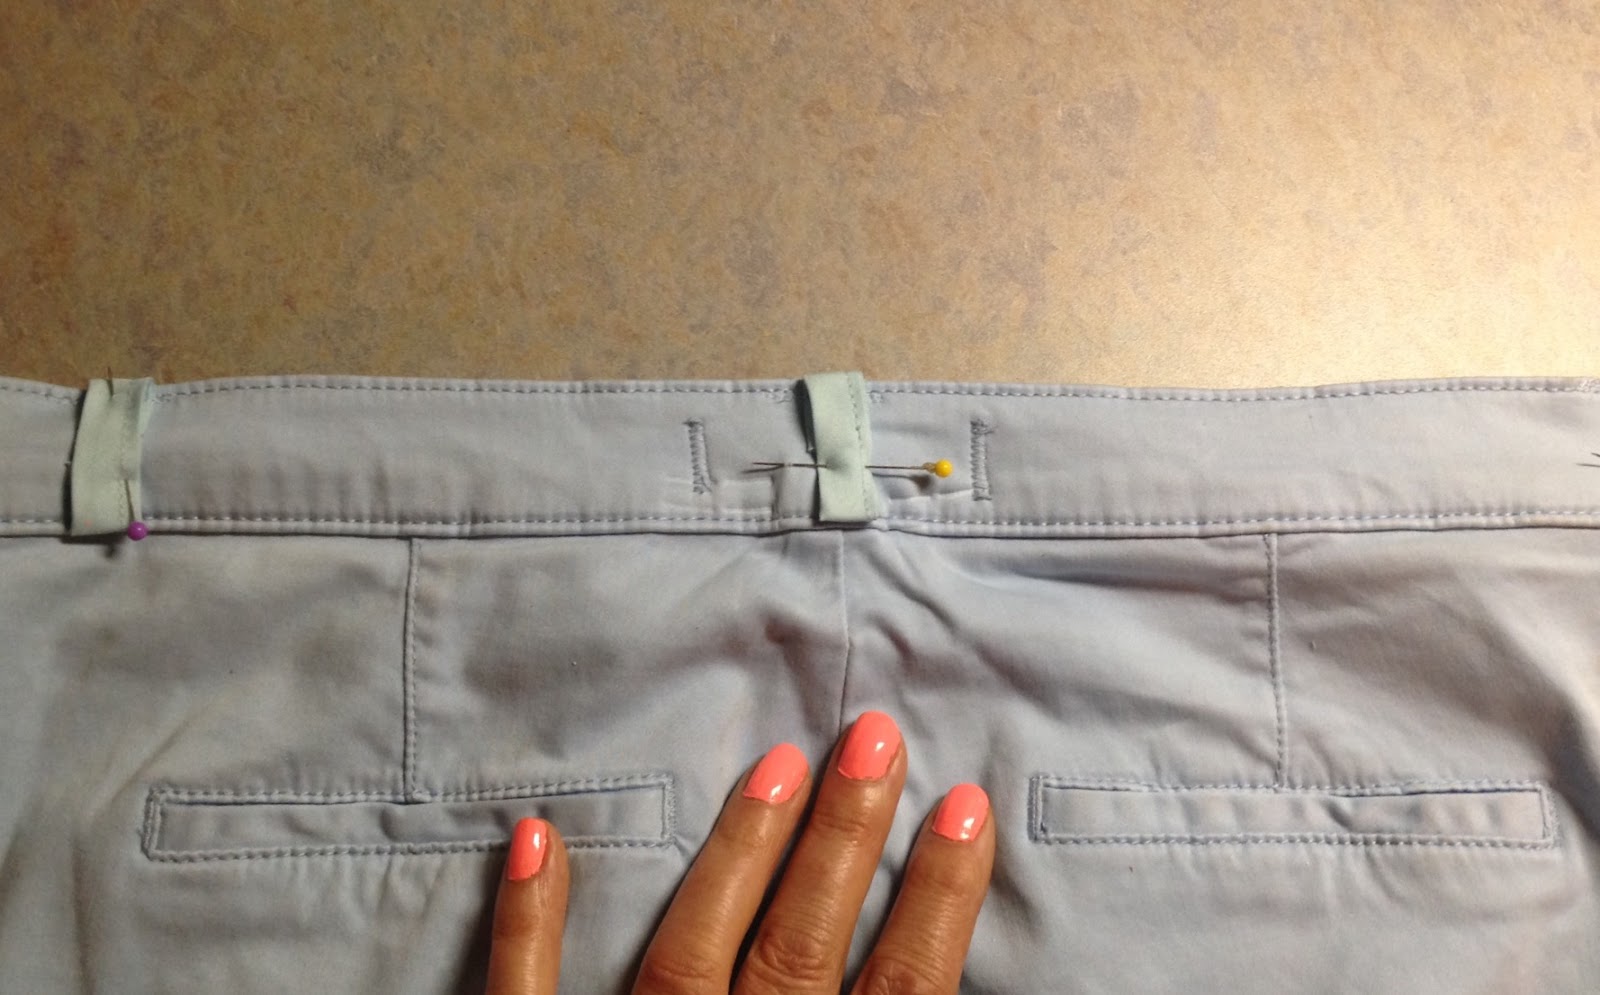
Once all the loops are sewed on once, I then folded and pinned them down, and sewed the lower half.


To sew the bottom tab, I top stitched right over the fold following the existing top stitching on the pants on my guide. I then repeated the top stitching on the top of the loop. Top stitching is important to flatten down your loops. If you only sew from underneath, the loops will be bulky and stick out. Plus, unless you hand sew your loops on, it's almost impossible to sew underneath the bottom loop.

This belt fit just perfectly through the loops and was all I needed to hold up my pants.
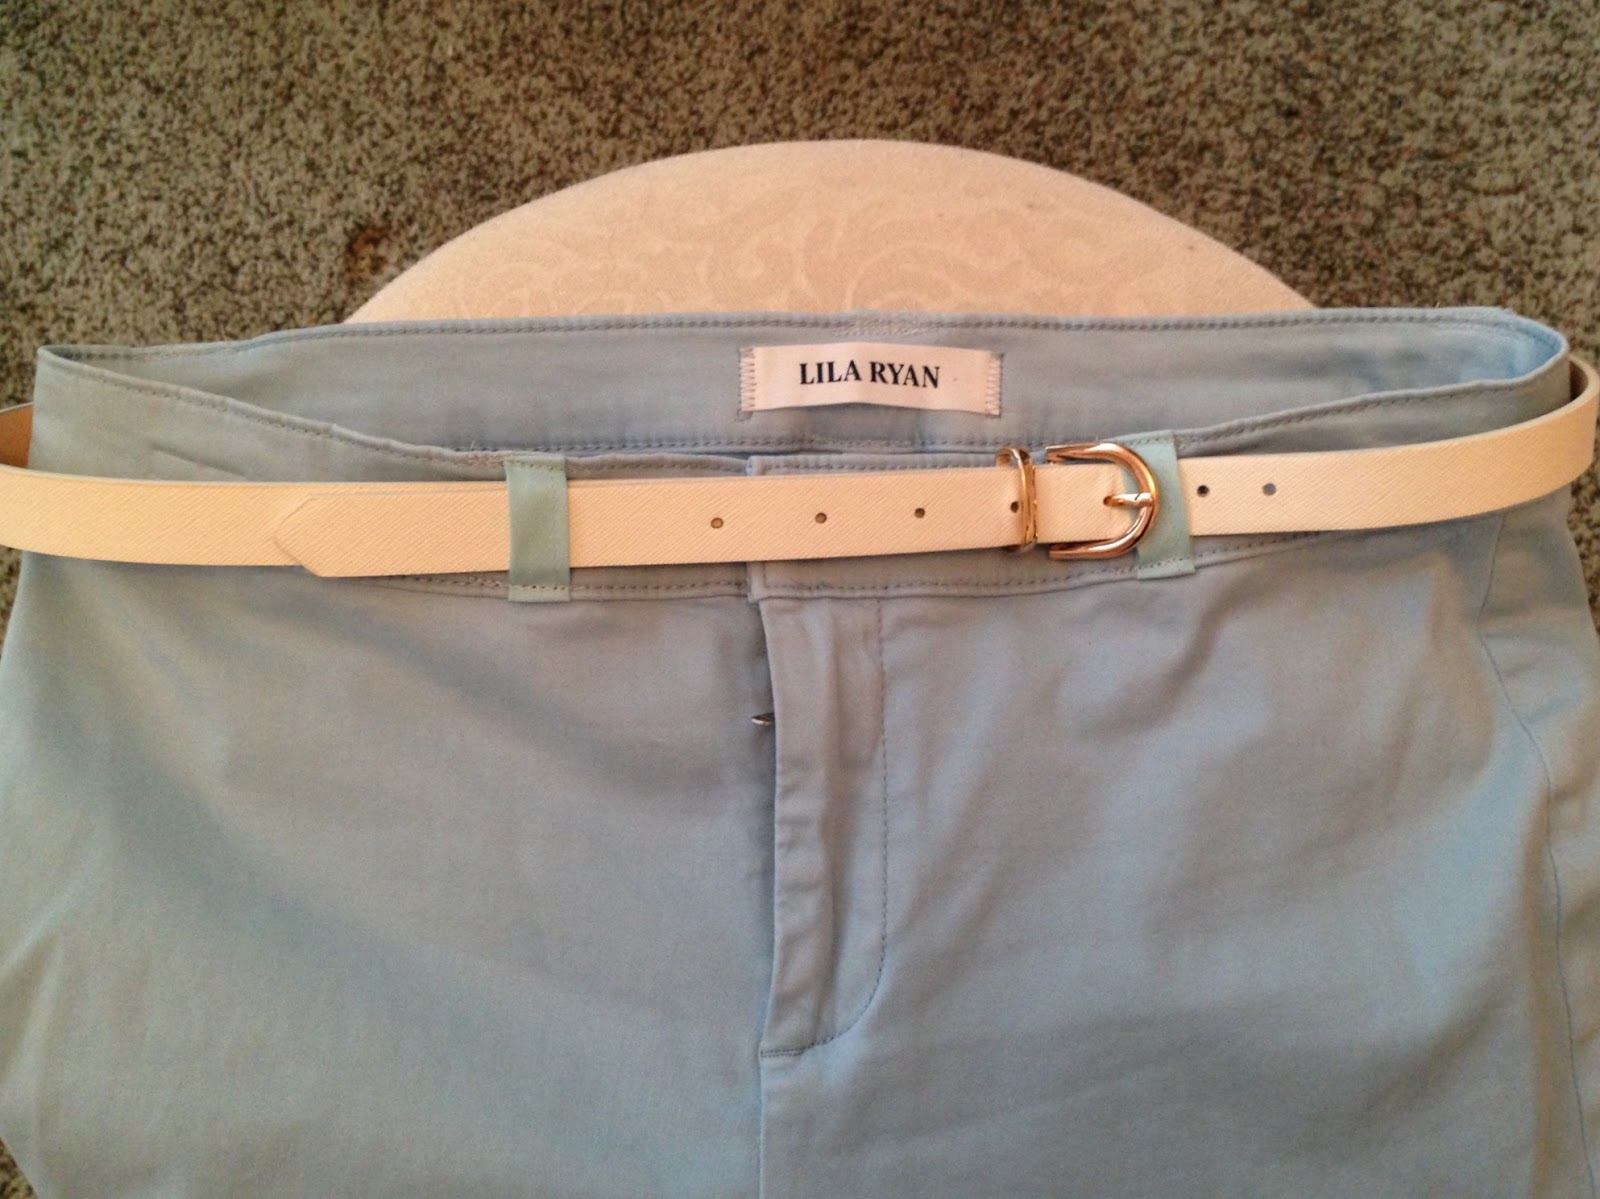
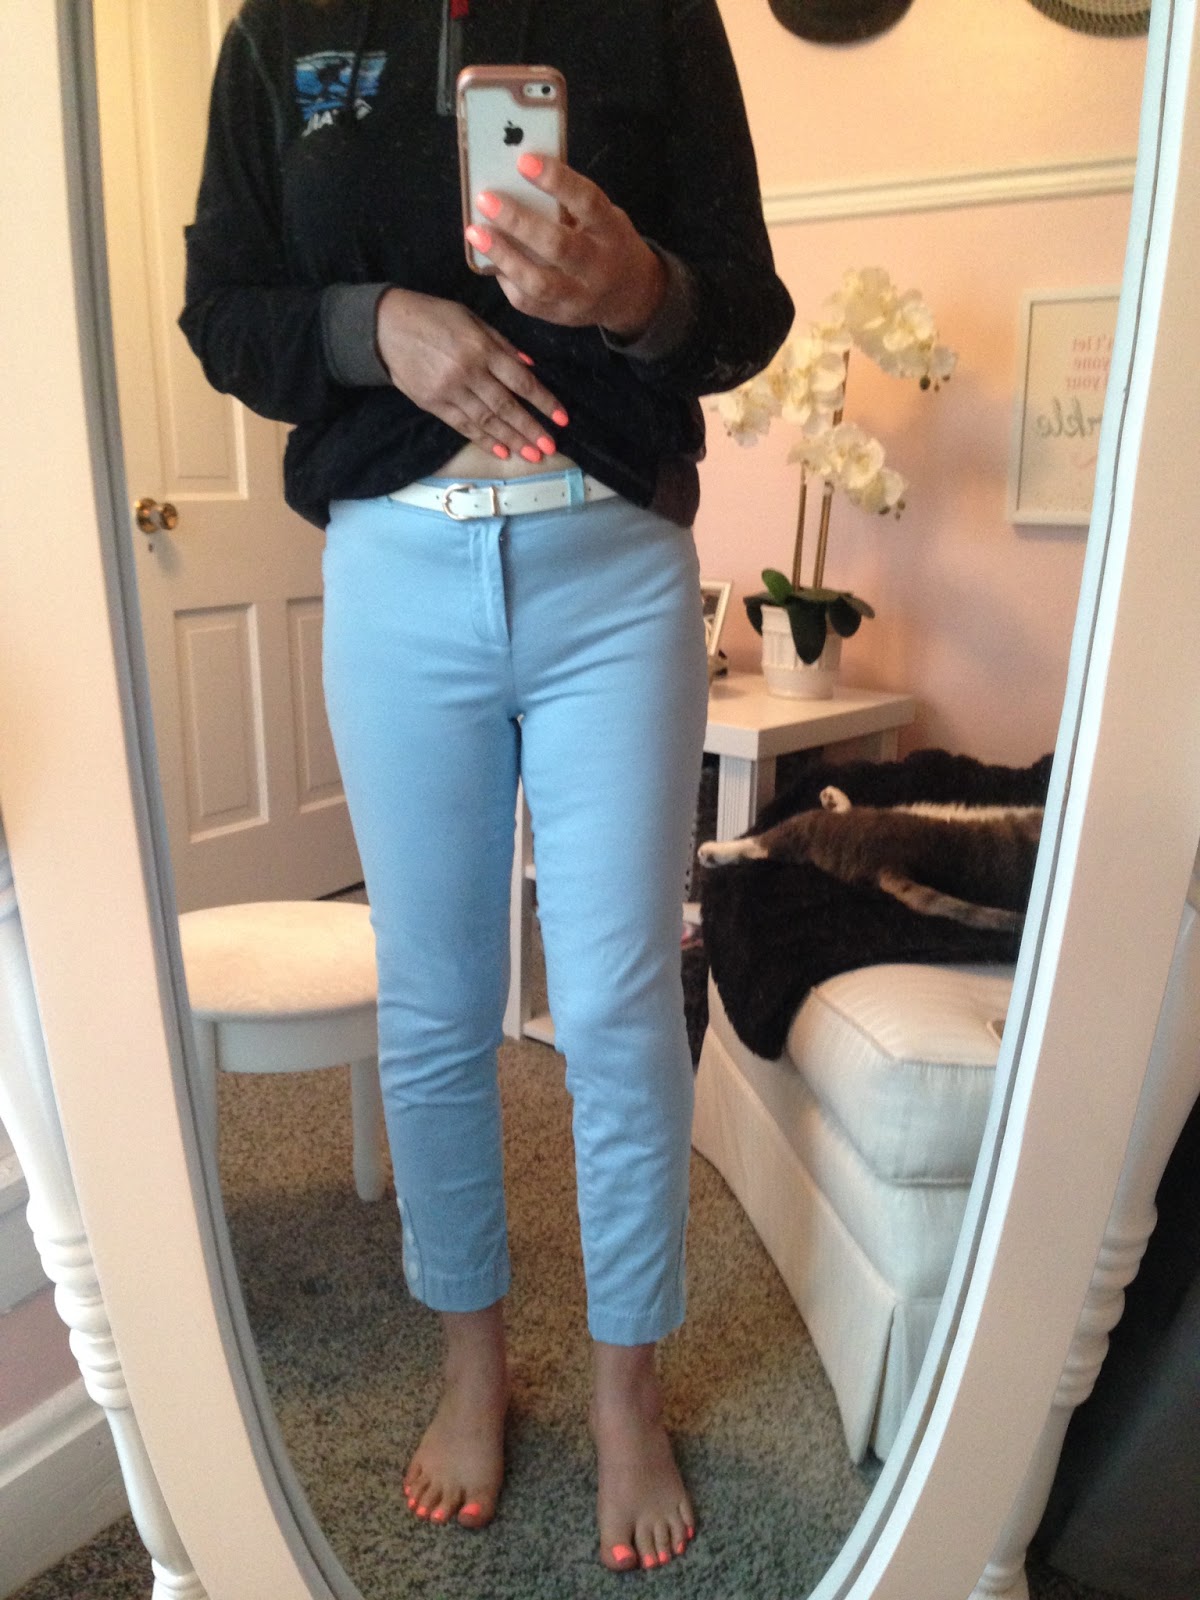
And here is a selfie of me wearing my pants with the new belt loops! What a difference a belt makes! Now I can wear my pants without them slipping down. I have no idea why the pants did not come with belt loops in the first place. They are a stretchy fabric, but any other pants I own that are stretchy have an elastic waist if their are no belt loops.
I hope this tutorial was easy to follow for you! Let me know in the comments if you have any questions.
Have a Great Day! Amy
Linking Up with these Fabulous Blogs HERE!
How clever is this?! Thank you so much for sharing!
ReplyDelete-Ashley
Le Stylo Rouge
Thanks Ashley!
DeleteThey look great Amy. Definitely lots of patience involved sewing them on, I think! But I am sure it will be so much easier to wear them now and they do look gorgeous! Love the shade of blue and such a perfect lengths for spring and summer too!
ReplyDeleteThanks! It didn't take long at all thanks to the bias tape. If I would have had to cut material to make the bias tape, that would have taken a lot longer.
DeleteWhat a great idea! So many times we don't think about how easy it is to fix simple issues with a garment. I've never tried adding belt loops before but I will keep this in mind!
ReplyDeleteThanks Laura!
DeleteWhat a great tutorial! I would have never thought to do this and love how it turned out! Those pants are so cute on you!
ReplyDeleteJill - https://www.ewg.org/skindeep/
Thanks Jill!
DeleteTodo es precioso!!! muchas gracias por tu visita!!! feliz dia!!! :)
ReplyDeleteThanks!
DeleteOkay I am impressed!! You definitely made it look easy.
ReplyDeleteAmy Ann
Straight A Style
Thanks! It was easy!
Deletewhat an easy tutorial! I love this idea!
ReplyDeletehttp://www.ruthyannie.com
Thanks Ruth!
DeleteThis is SUCH a great idea and I didn't even know you could do this (but, duh! of course you can!). I love the color you selected to make the loops with.
ReplyDeleteCarrie
curlycraftymom.com
Thanks Carrie! I got as close to the color of the pants as I could.
DeleteNow that's a nifty trick! Thanks for sharing this dear!
ReplyDeleteJessica | notjessfashion.com
Thanks Jess!
DeleteThanks Julie!
ReplyDeleteGreat idea Amy! Thanks for linking up with us at the #WednesdayAIMLinkParty 38
ReplyDeleteThanks Sylvia!
DeleteThanks so much for linking up at the #UnlimitedMonthlyLinkParty 1! Pinned ♥
ReplyDeleteThanks!
DeleteThanks Marilyn!
ReplyDeleteThis looks like the exact solution I was looking for. It looks like it’s been a while since you shared this. Can you tell me if the bias tape frayed at the ends over time?
ReplyDeleteNope, it never frayed. It works perfectly and I never had to repair them.
Delete