Showing posts with label handmade birthday card. Show all posts

Tuesday, March 25, 2025

"That's Rough" Dirty Dozen Card-Making Challenge

Ten months ago I wrote in THIS POST that I was given the great honor in the paper-crafting world to join the "Dirty Dozen" on Splitcoaststampers.   Splitcoaststampers is an on-line paper crafting community where crafters can learn new techniques, chit chat with each other, share their art work, and so much more.  One part of this community is "The Dirty Dozen".  This is an invitation only group of crafters whose work is seen as exemplary so they are asked to be part of the Dirty Dozen.  The requirements of the Dirty Dozen is to create six cards for six months centered around a different theme each month.  The cards then are uploaded into the "Dirty Dozen Gallery" and only fan club members are allowed to see them.  After six months, Dirty Dozen members are allowed to post them elsewhere on social media or their blogs.  Well, it has been six months since I completed my first challenge, so I can finally show me my first set of cards!

The fourth Dirty Dozen theme was "That's Rough".  Members were asked to add texture to their cards such as sand, grit medium, glitter, etc. These are my submissions:

Stitched Wall Hanging

My first card was my favorite for this challenge. Of all the stitching dies I've received through Spellbinders I have loved this one most of all.  I just think it's so pretty with the flowers and lovely frame. 

The texture in this card is both the stitching and the dry embossed background. 


To make this card, I used the Spellbinders Stitching Die "Stitched Wall Hanging".  I cut all the pieces, stitched and assembled the card.  The background is a Cuttlebug embossing folder.  I added sequins and pearls for embellishment. 


Hello Stitched Flower Card

My next card also uses a stitching die and embossing folder, but here I added even more texture with the burlap.


To make this card, I used the Spellbinders "Stitched Flower" die.  Once again I cut all my pieced and stitched them up with embroidery floss.  I dry embossed a white background using a Cuttlebug embossing folder, then I cut a strip of burlap paper and glued that on top.  From there I just randomly placed the flowers along with some pearl embellishments and a sentiment.


Baby Card

In this card I used lots of glitter and embossing powder to create my texture.


To make this card, I created a starry background using a Spellbinder's stencil "Star Bright" and Lumiere by Jacquard "Pearl White" Light Body Acrylic.  The image and sentiment are retired Stampin Up! "Buggies and Booties".  The sentiment is embossed in Black Glitter embossing powder.  A silver glitter ribbon, twine, and baby rattle charm was added for embellishment. 


Wedding Card

My next card gets its texture from the black velvet designer paper in the background.  It's hard to tell in the photo, but the black florals is velvet and is so luxurious to the touch. 


To make this card I cut a piece of the velvet designer paper and glued it to the card base.  The bride and groom image is from Inkadinkado "Wedding/Marriage".  I popped the main image panel up on dimensionals and added a black ribbed velvet ribbon for even more texture.  Black adhesive crystals were added for embellishment. 


Unicorn Shaker Card

For my next card, the texture is inside the card.  You can't feel it, but you can see it!


To make this card I used the "Be Unique" Sweet and Sassy stamp set and coordinating dies.  I created a cloudy background with a Tailored Expressions Cloud Stencil, then I adhered my images.  I put glitter on the rainbow and used black glitter embossing powder on the word "magical".  The rainbow clouds have white flocking.  Sequins were put inside the card to create a shaker effect. 


Iris Card

For my last card I used mediums, flocking and raised die cuts for my texture elements. 


To make this card I used the Spellbinder's "Bearded Iris" die.  I cut the pieces, then using a stylus curled the pieces and assembled the flower.  I put orange flocking powder inside the flowers.  The background was created using Spellbinder's "Hummingbird" Textures Stencil and Lunar Paste.  More texture was added by using gold embossing powder on the sentiment. 


Tuesday, October 10, 2023

"Toot, Toot! Happy Birthday!" Train Card

A few weeks ago we drove down to my daughter's home in Indiana to celebrate Labor Day and my youngest grandson's second birthday.  Elisha LOVES trains, so I made him this card.


To make this card, I used a retired Stampin' Up! set "Circus Train".  This is just the cutest set!  I love all the images in this set, so I had to enlarge the card just so I could use all of them.  I stamped all the images separately, colored them in, and popped them up on dimensionals.  I hand drew the train tracks.  I stamped the "Toot, Toot!" directly onto the card using a alphabet stamp set.  The happy birthday is a die cut made with an MFT die.  I cut two "happy birthday"'s out so I could create a shadow.  The clouds are an MFT die too.  I popped the clouds up on dimensionals too.


And here are some photos and a video of Elisha's sweet little birthday party.  He didn't know what to think of his flaming piece of cake.  And his favorite gift of all was the motorcycle.  He said "Cool!" when he saw it. 😂


 Have A Great Day!  Amy

Linking Up with these Fabulous Blogs HERE!

Tuesday, September 12, 2023

Handmade Birthday Cards for Little Girls and Boys

My daughter and her family came up to visit us for a week this summer.  We had so much fun, like we always do, and I promise someday soon I will blog about it.  I've been saying that a lot lately.  I don't know why it's been so hard for me this year to find the time to blog, but it has.  Anyway, while they were here we celebrated Atlethea's and Atticus' birthdays because they are both summer babies.  Here are the cards I made for them:


Atticus' card was made using the retired Stampin' Up! set "Ahoy, Matey".  I have always loved this set.  It is so cute!


To make this card, I created a little pirate scene.  I used a stencil and markers to create a sea and sky.  The clouds were cut using an MFT die.  Everything else was in the set.  I simply stamped the images, colored them in, and cut them out.  I popped the pirate on dimensionals but glued the chest and ship onto the card.  I stamped the sentiment onto the cloud.


For Alethea's card I used a Pure Innocence image from MFT.  I also created a background using markers.  The grass is a stamp.  The clouds are the same MFT die used in the pirate card above.  The butterfly and flowers are Cuttlebug dies.


For this card, I didn't use any dimensionals.  I just glued everything onto the card after coloring it in and cutting it out.  Once again I stamped the sentiment onto the cloud.


And here are the little rugrats proudly displaying their cards.  They are so CUTE!


Here's some snapshots of the kids opening their presents.  They sure had fun!


Alethea has been really getting into painting her fingernails, so her mom bought her some pretty colors of nail polish.  


Atticus was super excited to get this "Action Bible"...perfect for little boys.  It is loaded with comic book style illustrations.  I would love to read this bible myself!


But perhaps Atticus' favorite gift of all was "The Armor of God".  He has been wanting this dress up set for so long!  He has the whole armor of God from Ephesians 6 completely memorized and he's only four years old.  Be sure to watch the second video below.  It's so adorable because he is so excited to put on this costume and he tells the significance of each piece.


And finally, here are some family videos.  Enjoy!


                                                            Alethea Opening Her Gifts:


Atticus Putting On the Armor of God


Singing Happy Birthday to the Grandkids


I hope you liked the cards and enjoyed this brief snapshot into my family.

Have A Great Day!  Amy

Linking Up with these Fabulous Blogs HERE!

Tuesday, March 7, 2023

Handmade Combination Retirement and Birthday Card

One of our dearest and longest friends had a combination 60th birthday and retirement party.  They said "No gifts please.  Just the presence of your company" in their invitation, but I at least wanted to give a card.  The question is, when an event is two separate things at once, how do you create a card?  Most cards are either birthday exclusive or retirement exclusive.  Now, I could have given two separate cards, but I decided to create one card celebrating both milestones.

I started by searching my craft room for appropriate stamps.  Nothing.  So then I turned to the Internet and googled "Free Happy Retirement Images to color" and I found this one.   I thought it was perfect for the occasion because I knew the recipient hopes to be a "Snow Bird" plus I saw the sun in the image the perfect spot to stamp "Happy Birthday".


To make the card, I printed the image onto card stock sizing it down to fit an A2 sized card.  I then colored the image in with Copic Markers and stamped "Happy 60th Birthday &" on the sun.


Then I just glued the image onto a card base.  Easy Peasy and perfect for the occasion. 


 Have A Great Day!  Amy

Linking Up with these Fabulous Blogs HERE!

Tuesday, September 20, 2022

Baby Elisha's First Birthday

My third grandchild Elisha turned one and this is the card I made for him.


The images are from a retired Crafty Secrets set.  This company went out of business, which is such a shame, because they sold the sweetest vintage images.


To make the card I glued patterned paper onto a white card base.  The baby image and cake were stamped on a separate piece of white card stock, colored, and cut out.  I then cut a scalloped frame and white square using Spellbinder's Nestabilities.  I glued the white square directly to the patterned paper, but the scalloped frame and baby image were popped up on dimensionals.  The candle was stamped directly onto the white square paper, and the cake was glued onto the white square.  I used gold "Stickles" for the flame.

The sentiment was stamped onto separate card stock using ink to match the patterned paper.  I cut the sentiment out and popped it onto dimensionals.

The balloon was an image in the set, so was the number "1".  Once again, the balloon and the number "1" were stamped onto a separate piece of card stock, colored, and cut out.  I hand wrote the "st".  The balloon was also popped up on dimensionals.


And here is cute little Elisha opening up his card!


And here he is opening up his presents with the help of his mom and two older siblings.  He is the third child, so there is nothing he really needs.  It's so hard buying presents now, because these kids have everything already!  I just purchased him a decor planter for his room and some clothes.


One of our family traditions that we do with each grand child is video tape them enjoying their first piece of cake.  None of them have ever had anything like cake before year one, so watching the expressions on their faces is always priceless.  Each child's approach and reaction to the cake has been different.  Elisha, was slow to get going with his cake, but once he put it in his mouth, he was all in!


And here is the mess his mother had to clean up when he was done! 😄


 Have A Great Day!  Amy

Linking Up with these Fabulous Blogs HERE!

Tuesday, August 3, 2021

Alethea & Atticus Birthday Celebrations: Cards, Tags, and Decor

My grandchildren were both born in the month of July, so when we get together with the kids over the summer, we celebrate both their birthdays at the same time.  Now the third grand baby will be a fall baby, so I don't know what my daughter will want to then.  

I bought the grand babies gifts my daughter told me to get.  Alethea already owned a light up mermaid, but the light up part of the doll stopped working so her mom told me to buy her another one.  I didn't buy the exact same mermaid, because I wanted her to have a different one.  Atticus, saw an animontronic dinosaur at another child's birthday party and really wanted one for himself, so I bought him a T-Rex.  We were really worried it might be too scary for him, but he ended up loving it!

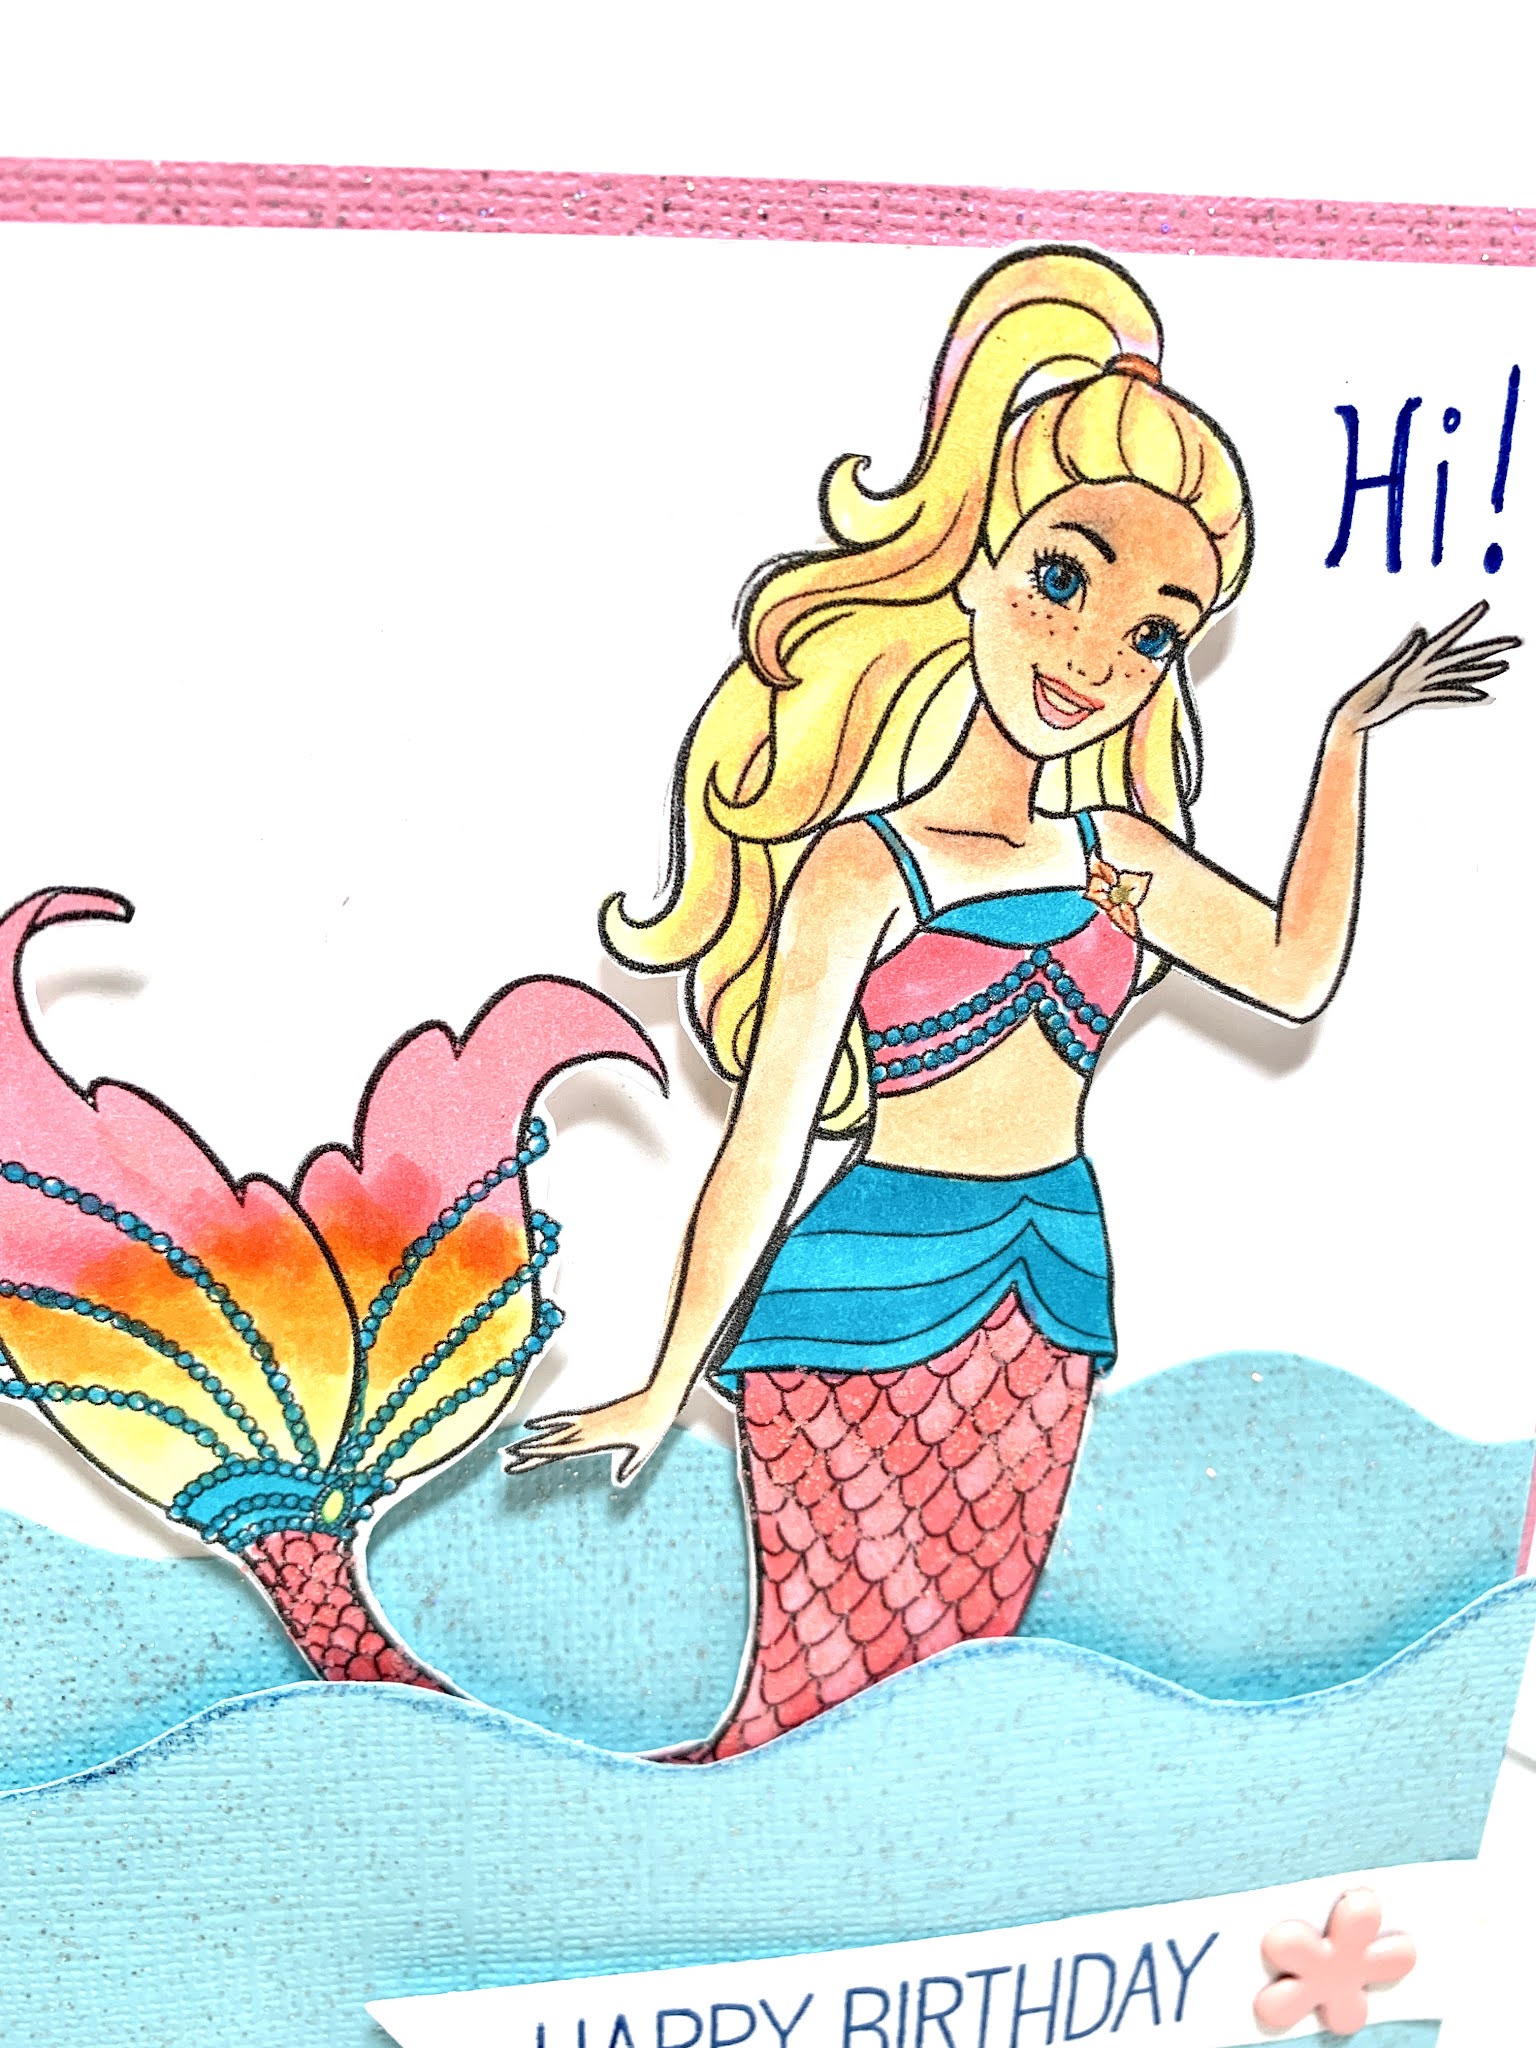
I made handmade cards and tags for both the kids.  I matched the card to their gift.  For Alethea's card and tag, I googled "Barbie coloring book pages" and when I found some I liked, I printed them  onto sticker paper.  


I created the ocean waves with blue glitter paper.  I took a wave stencil drew it onto the paper and hand cut it out.  I did two waves.  One wave I glued right onto the paper, the top wave I popped up on dimensionals so I could slide the Barbie image in:  making it look like she is popping out of the water.


I colored the image exactly like the doll I bought her, then I used lots of glitter and glitter to make any little girl happy!  I popped Barbie up on the card with dimesnionals and hand wrote "Hi!" on the card.
The "Happy Birthday" sentiment was stamped on a separate piece of white card stock then the banner was cut with a MFT die.  I adhered it to the card with a floral brad.  I put the entire card base over a pink glitter card stock then adhered that to the card.

The tag was made with the same pink glitter card stock.  I cut it with my Cricut machine.  The image was colored in with markers, then I used a Spellbinder's Nestabilities to create a nice rectangle.


I used a corner rounder to round the edges of the main image panel and then I stamped a sentiment.


For Atticus' card I used a dinosaur Circuit Cartridge.  The Dinosaur part was already on the cartridge, I just cut it out in green paper.  Then I cut out the palm tree and the number "2" with different colored card stock.

The tag was also on the cartridge, I simply cut out the dinosaur part in green paper and I used white card stock for the tag portion.


I glued the palm tree to the card and I tied the number "2" with a piece of twine.  The sentiment is a three dimensional sticker from my stash.


For the tag, all I had to do was glue the two pieces together.

Now onto the party decor.  The party was just our small nuclear family so I didn't want to make too much of a fuss with decor, but I wanted to do something to make it a little extra special for the grandkids.  I also wanted a theme that was good for both genders too.  I ended up finding the cutest "Farmhouse Birthday Decor" at Hobby Lobby.  It ended up being perfect because the room we had the party in is already decorated in the modern farmhouse style.


I threw a vinyl green gingham table cloth diagonally across the table as an accent.  Then I used red paper plates and napkins.  We normally always eat with real china, but it didn't match the decor, so I settled on paper plates.


On the table sat the cutest card board cow/pig/rooster figurines and on each chair I tied an animal image.
I also hung animal images from the fan/chandelier.


On the dining hutch I hung the "Happy Birthday" sign, and more animal cutouts.


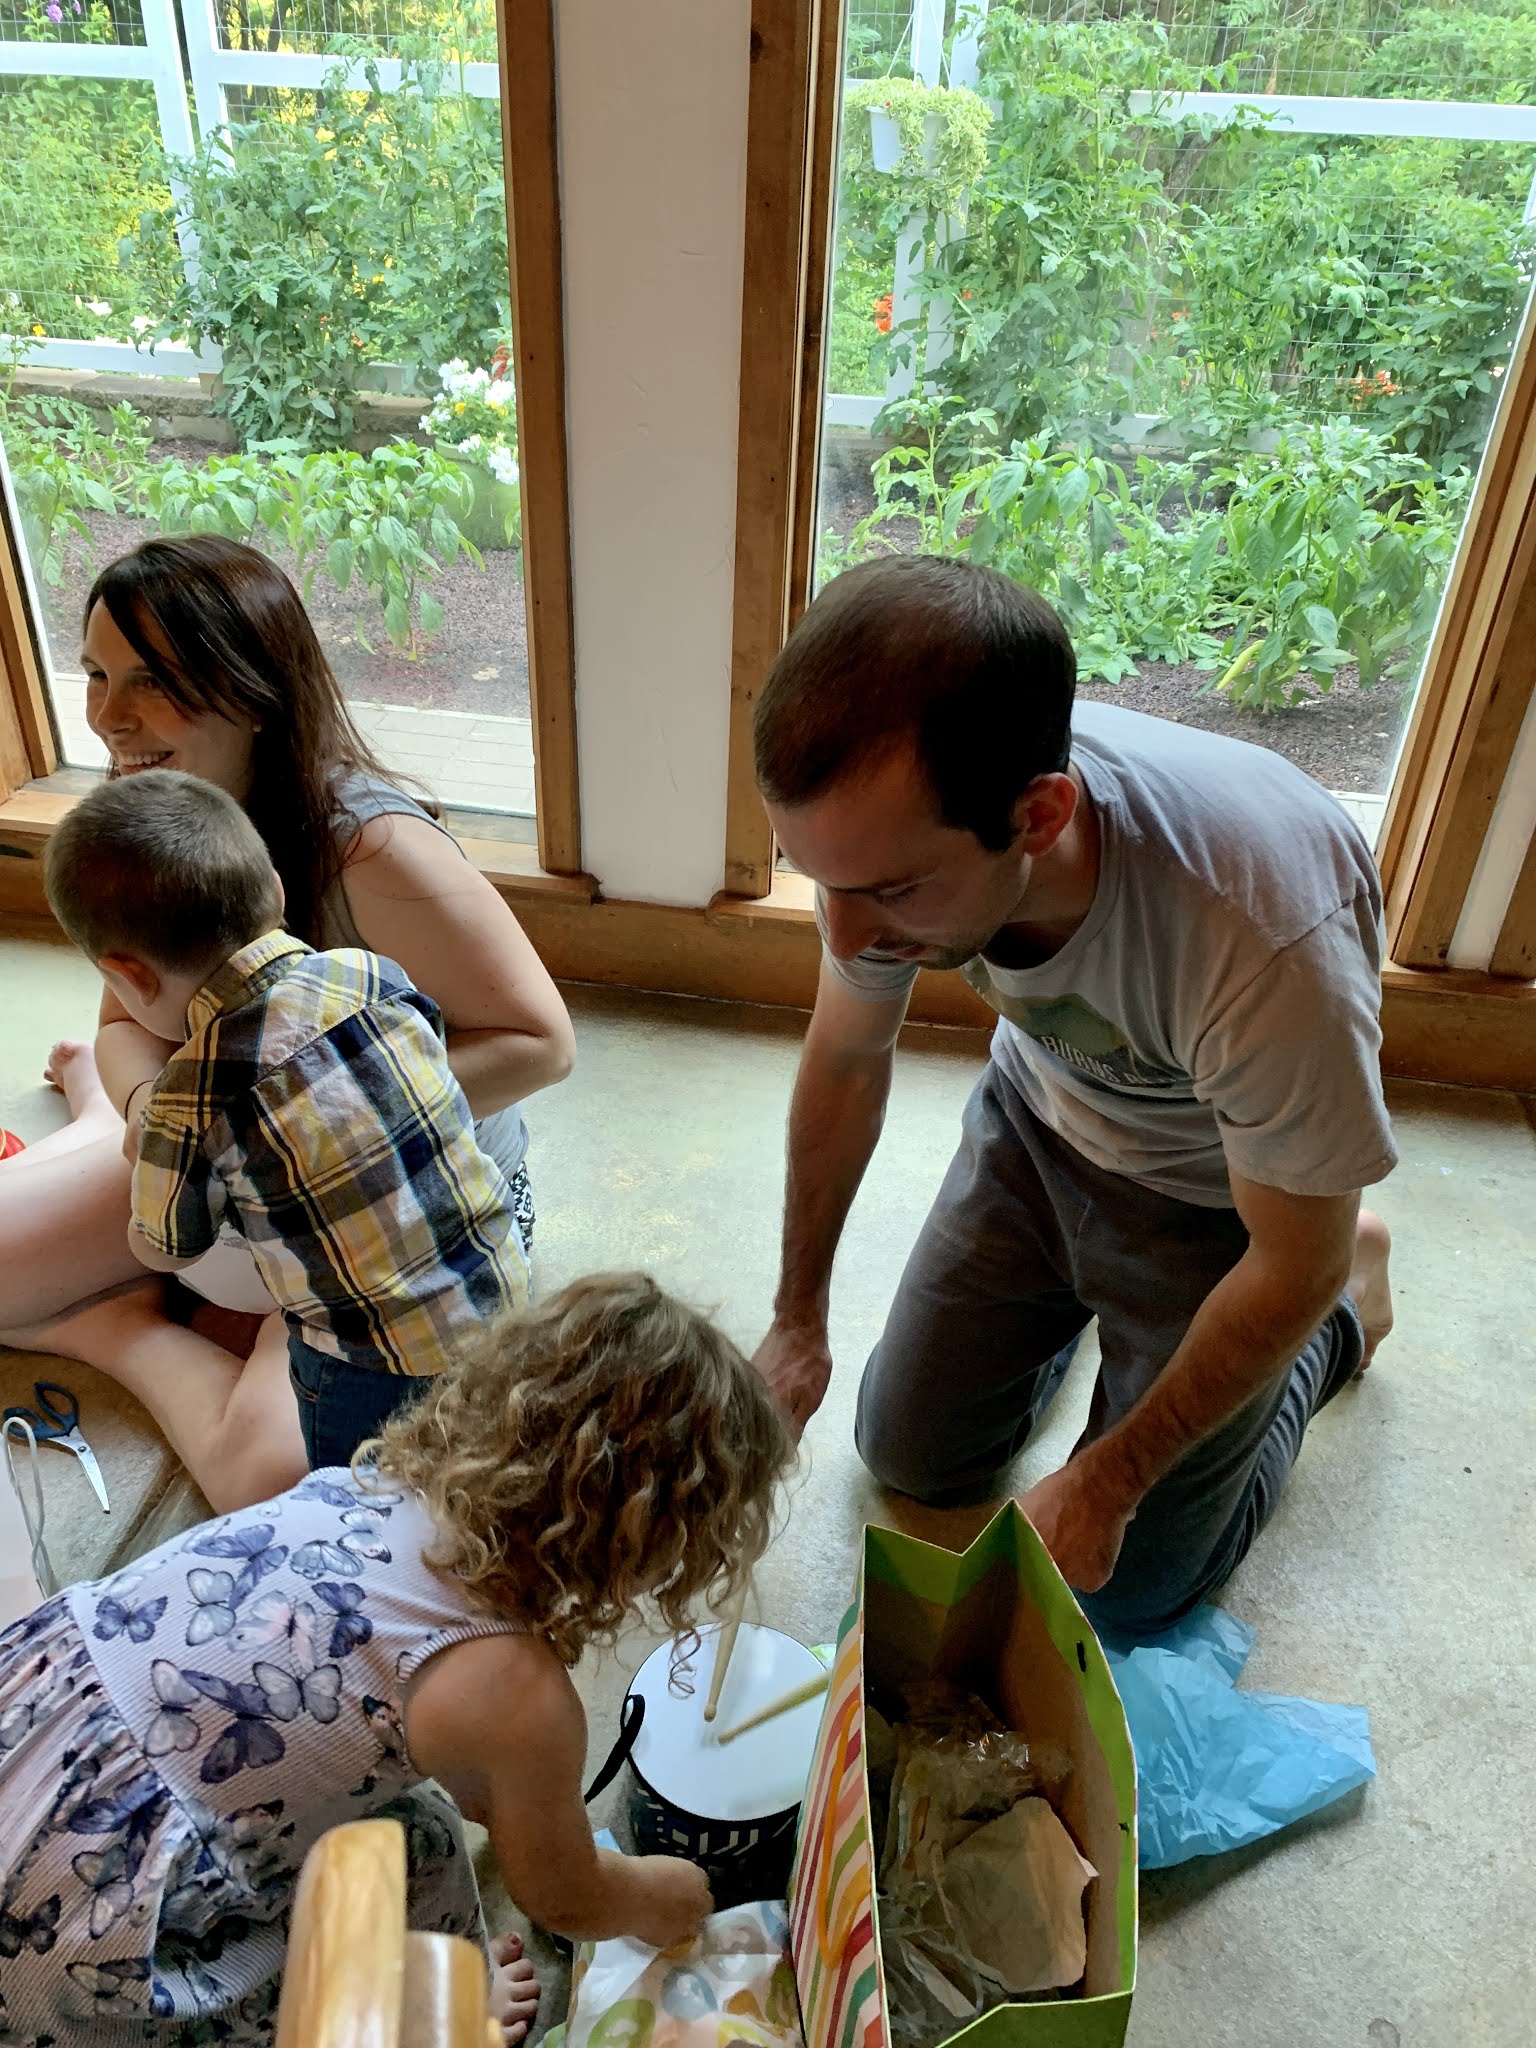
And here are some pictures from the party.  If am in none of them because I was both the photographer and videographer, so if you're looking for me, you won't find me.  ðŸ˜€. But if you watch the videos at the end of the post, you will definitely hear my voice.  I really need to be more diligent about handing the camera over to someone else so I get in the pictures too.  Someday these kids will be looking at these pictures and may think I wasn't even there.

In the picture below the kids are opening up their joint treat box.  I gave them a box of edible goodies, and I swear they were more excited about the yogurt covered pretzels than the actual toys I bought them! 


Ashley and Jason bought Atticus a drum set.  He just loved it!  Of course my son Jordan, who is a percussionist, wanted to try it out for himself (see the second picture below), but Atticus got jealous about his uncle playing with his toy and pushed him away.


Their Uncle Jordan bought them bubble guns.  Instead of squirting water, they squirt out massive amounts of bubbles! These were the cutest things ever!  The kids had so much fun playing on the porch with these!


Alethea's mom gave her a case load of gel crayons and it made me jealous!  These crayons are amazing!  I will have to order my own.  She got them from Amazon.  


Alethea also received a Lego set from her Uncle Jordan.


Here Atticus is just about to rip open his dinosaur gift from us.  You must watch the video below if you have time.  His reaction to the animontronic dinsosaur is priceless!


Uncle Jordan also gave Atticus a fun book to read.


Here is Alethea opening up her gift from me and my husband.  I love how she takes the time to "read" the card.  She knows I make them for her and that they are very special.  Every time I give her a hand made card she displays it on her dresser.  She is so appreciative.


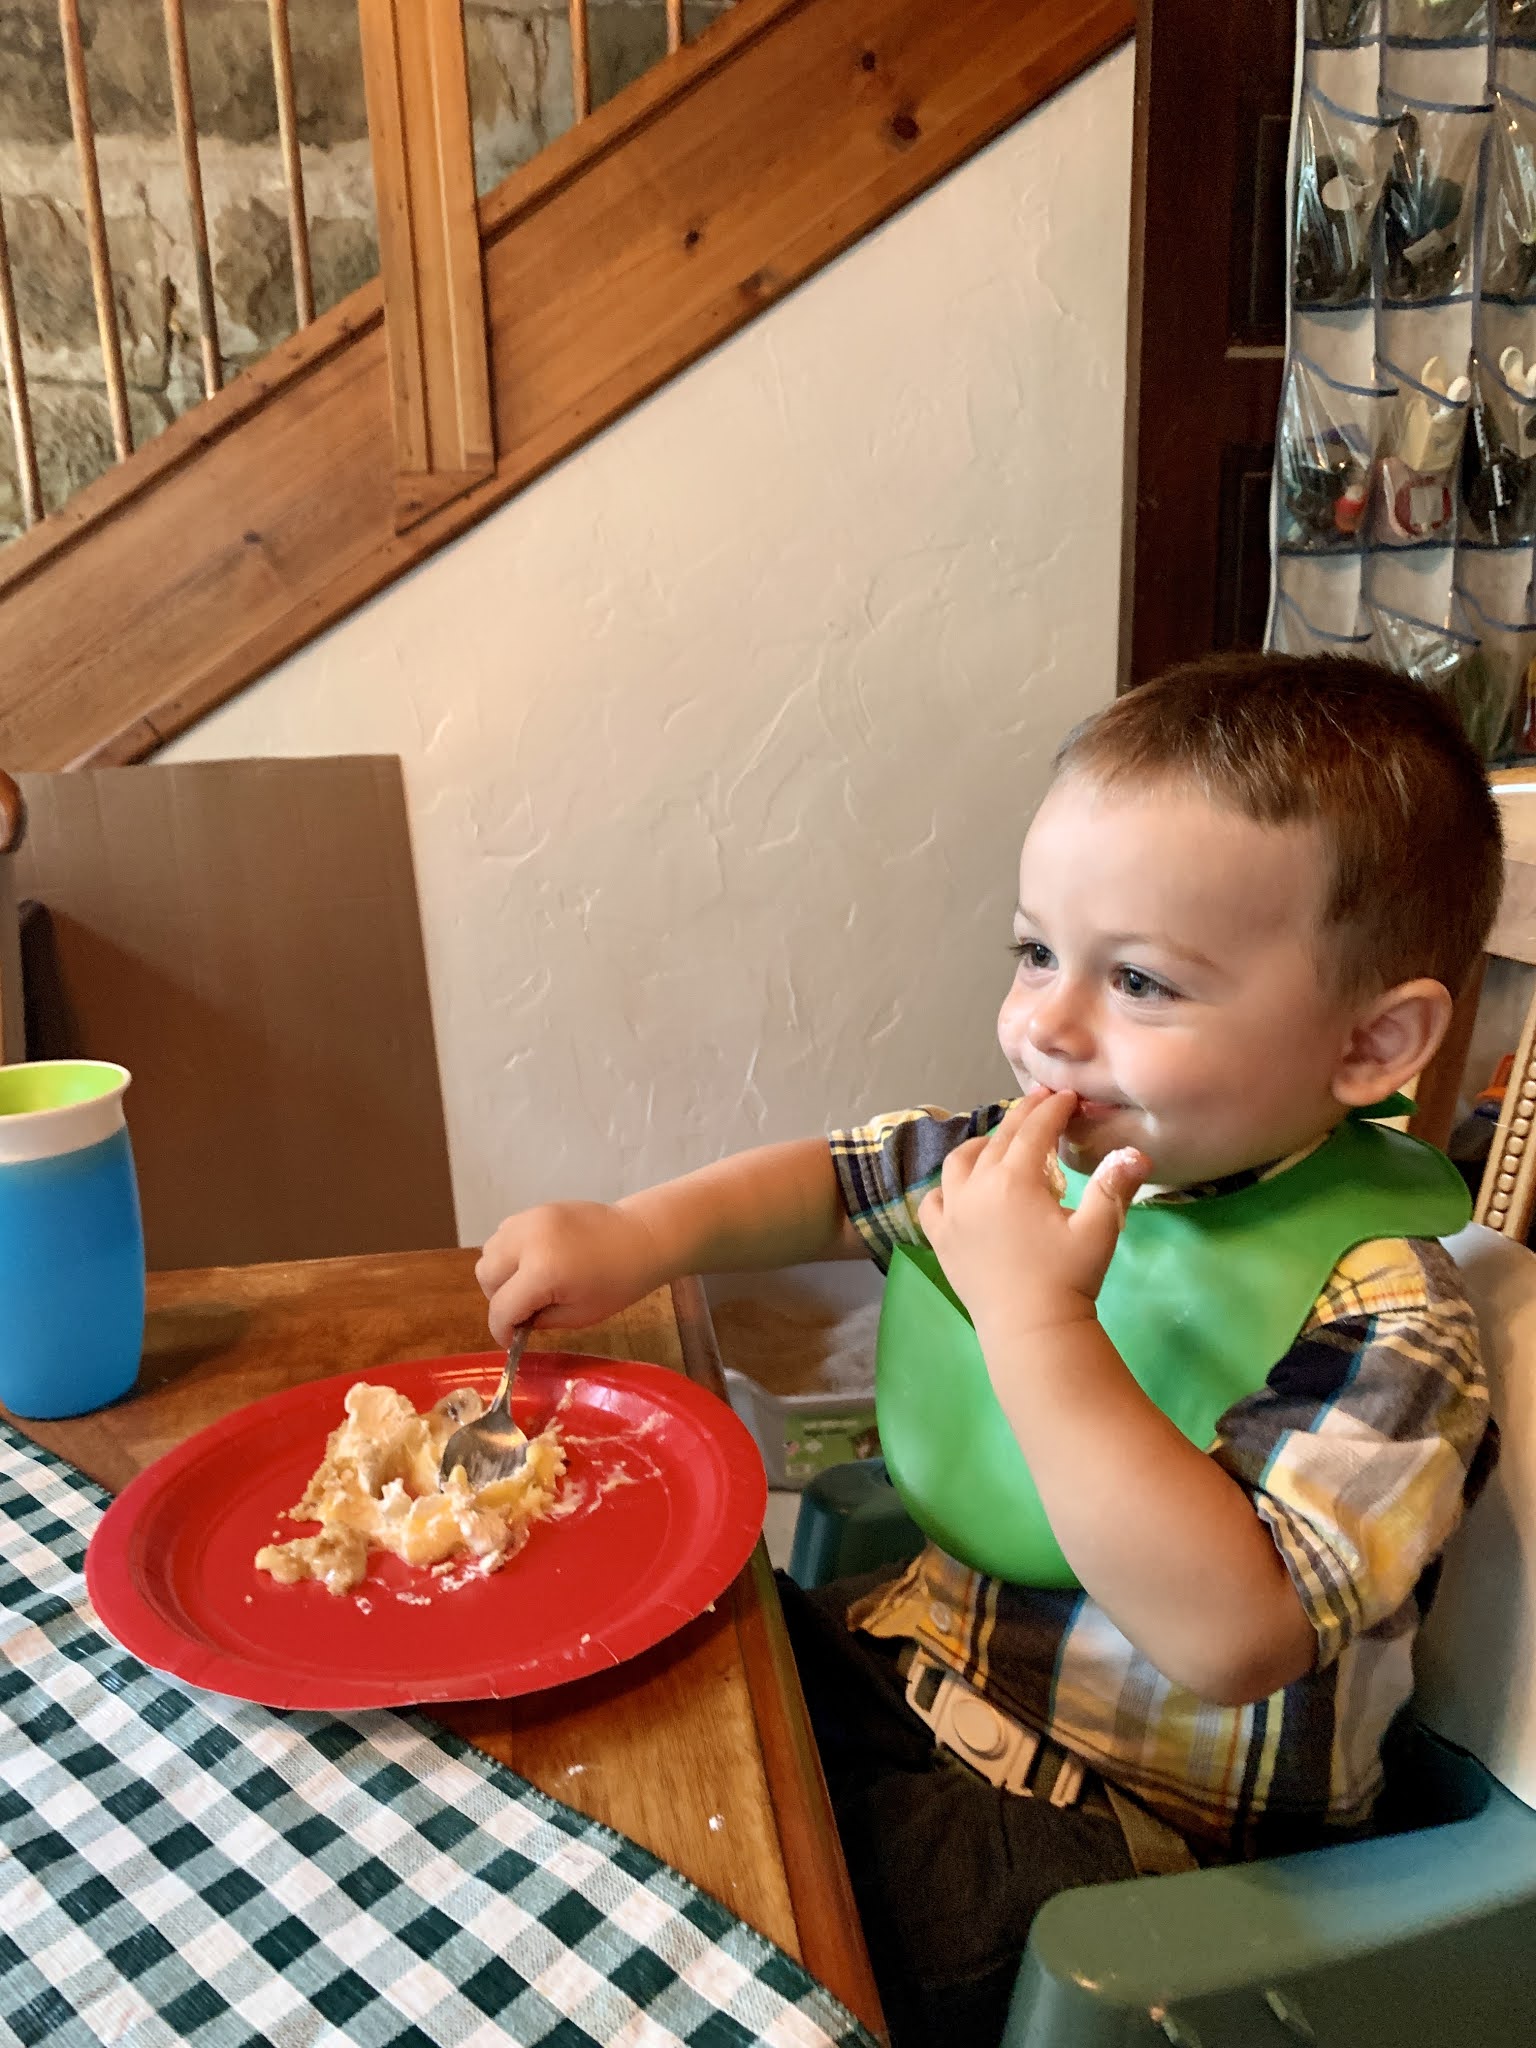
The kids had two birthday parties before they even got to my house, so I thought they were already "caked out" and I decided to have a Banana Cream Pie for dessert instead of a cake.  


Atticus LOVES bananas so he sure loved Banana Cream Pie!


It was such a fun birthday party!  It is such a joy to be able to bless ones grandchildren with gifts that make them happy.  

And if you care to see more than just photos, I've included two cute videos of each grandchild opening up their gifts from my husband and I.


Have A Great Day!  Amy

Linking Up with these Fabulous Blogs HERE!