Every winter I like to do an indoor home remodeling project. We've lived in our house for almost twenty five years now, and let's just say, it was starting to look pretty dated and needed a "refresh".
The past five years or so I've been pretty busy turning my son's old bedroom into a
Beauty Room, transforming my daughter's old room into a
Guest Room, giving a fresh look to our
Master Bedroom, and even adding a
Bedroom to My Living Room. This winter I really outdid myself, as I not only finished painting my entire sunroom and craft room white (more on that in a later blog post) but also giving a very dated bathroom a fresh look.
This year, I had only planned on painting the sun room and the craft room white to match the family room that I had painted the previous year. All the rooms are open and connected to each other, so I really wanted just one cohesive color. Well, even though that was a big project as the rooms are quite large with high ceilings, I ended up finishing it a lot sooner that I thought I would; SO, I decided to scratch another room off my "To Do" list, not realizing how long this small room would take to finish.
Before I show the "Before" picture, here is the remodeled version:
BEFORE AFTER
Now you're probably wondering why this little room took me so long. It's because when we bought the house I "Cracked" the walls with Crackle Paint. Ugh! It was one of the biggest mistakes of life. At the time everyone did special painting effects on their walls and the "Tuscan" look was really in style. I thought it would be really cool to have walls that looked like they were cracked with age.
But the crackling effect was a disaster as the room always felt and looked dirty. And worse yet, every time someone showered the hot steam would cause the paint to peel off the wall. If you look on the left side of the picture where I handwrite the wore "Before", you can see the peeling paint. The middle and right of the picture is what the walls looked like as I was painfully stripping layer, after layer of paint.
To remove the crackle paint, I first googled "How to remove crackle paint". The advice was, "Just scrape the old paint off and prime over it.". I tried it, and the second I primed over it, the paint cracked again. In the picture below, you can see what the wall looked like when I first just used a putty knife to scrap away the old, flaky paint.
Well, scraping and priming didn't work, so onto Plan B. I did more research and was told to use paint stripper on one post but other posts said "Don't use paint stripper, it will destroy your walls!". I felt I had no choice, it was either paint stripper, or cover the walls with wallpaper. So I bought the gentlest stripper there is,
Citris Strip. I had to paint the stripper on THREE TIMES, and use a
heavy duty paint scraper after each coat. In the picture below you can see where the brown paint is that's after two layers of stripper, and the green/yellow color is after three layers of stripper.

Once the walls were stripped of paint as much as possible (even after three attempts, I still couldn't get all the paint off), I then used a paint thinner to remove the goo left behind by the stripper, and then I had to sand. It was a very long, tedious process and I wanted to burst into tears and cry multiple times. The only way I got through it all was I kept picturing in my mind how beautiful the room would look when I was done.
The picture below shows the wall after the process was finished, and waiting to be primed. Notice, how after all the stripping and sanding I STILL could not get all the brown paint off the wall, but I crossed my fingers, and went ahead and primed the walls anyway.
When I was done priming the walls, only a few spots continued to crackle, so I took some
Spackling and applied it over the crackling paint, and that seemed to do the trick. No more cracked paint!
After priming, I painted two coats of semi-gloss "China White" on the walls, and did a high-gloss white on all the trim and the interior of the closet. Even though I never changed the flooring, the sink, cabinet, or fixtures, it felt like a brand new room! The room now feels so clean and fresh. The tired, dated, dirty old look was gone!
Now let's take a tour of my new bathroom shall we! This is the room if you were just entering it from the hallway. I did not buy any new decorations for this room, I used old decorations I already had.
The room faces west and has two large windows that bring in a lot of light, so I hung a plant in the window. The chair was always in the bathroom, but it used to be white, and I painted it with
black chalk paint to match the picture on the wall and the lighting fixture.
I kept the same bath rugs as I did not think they were ready to be replaced yet, plus, my cat loves them and I knew he would not be happy if I got rid of them 😀. But, I did get new window curtains, a new shower curtain, and new towels.
I love the look of hotel bathrooms, they always look so fresh with all white linens, and I wanted my home bathroom to have that same "clean, fresh feeling". I found this white shower curtain at Home Goods.
The lace panels inside the windows have always been there, and I kept them for privacy reasons, but the white curtains are new and are from TJMaxx.
The round table was also always in the bathroom, I just added some new decorative pieces like a mirrored tray, a trinket box, and an African violet. All these items were actually in other parts of the house, and I just relocated them.
I did pick up a new ivy plant from Walmart. The macrame hanger I already owned, but I purchased it from Amazon.
The beautiful light this room gets, plus the steam from the shower, make the plants very happy.
The pretty little pot the African violet sits in is new this year from Michaels.
The only new fixture to the bathroom is this wall mount lighted magnify mirror. Every time we stay in a hotel room, I would fall in love with these mirrors and wished I had one of my own. So I looked on
Amazon and found this one!
I cannot recommend this mirror enough! It lays flat against the wall when not in use. When you want to use it, just pull it out away from the wall. It has two sides: one is magnified and the other is not. Both sides light up.
The shelf and all the decorations were already in the bathroom, I just moved the decor around a little and gave the shelf a fresh coat of white paint.
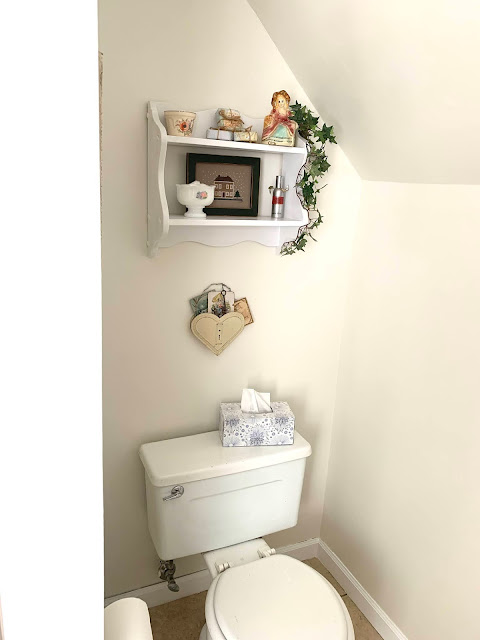
I basically use the shelf to store Q-tips and cotton balls in antique containers. Also on the shelf are decorative soaps and air freshener along with a couple of decorations.

On the wall to the left of the toilet is an old picture that has been hanging in this same spot ever since we bought the house. I've always loved this picture, and I saw no point in replacing it.
I think this Bathroom Refresh is a great example of how you don't need to do a big remodeling project to update a room. The bathroom has the same flooring, cabinet, counter top, mirror, and light fixture it always had...but simply painting the room a modern white and adding fresh window treatments and a new shower curtain, brought the room out of the 90's and into 2021!
I couldn't be happier with my new bathroom. I love how bright, clean, and fresh it looks. I love how the sun streams through the windows, and how happy my plants look in the space. It was really worth all the effort and time to transform it.
Have A Great Day! Amy
Linking Up with these Fabulous Blogs
HERE!


