Showing posts with label fall cards. Show all posts

Tuesday, October 15, 2024

Handmade Cards to Celebrate Fall

Hello! I am back from a fall break and probably my last vacation of the year until the holidays.  We drove down south to spend some time with the grandchildren during their fall break from school but we also made a couple of fun stops along the way of which I will tell you all about in my next travel post.

I always give the grandchildren gifts/cards for all the holidays/seasons.  They don't celebrate Halloween, so I keep my cards/gifts fall themed.

My first card uses a stitching die from Spellbinders.  Spellbinders has all these neat monthly clubs you can join where you get their latest product at a discount.  I really like the idea of combining sewing with paper crafting and I think their stitching dies are really different so I joined that club.  Every month I receive a new die in the mail, and this was September's die "Stitched Sunflowers".  Isn't it beautiful?  It is perfect for fall cards and thank you cards. 


This was probably the most challenging stitched die I received because the floss kept catching on the petals.  After a lot of frustration, I finally figured out to turn the die upside down while I was sewing.  Also, each petal had to be sewn individually or the thread would be seen as you went over to the next petal.  So it was a bit time consuming as I had to cut and tape the thread after finishing each petal.  Not all stitching dies are this complicated.  But the result is beautiful, and I love it!  My daughter went crazy for it too and said "That is one card that needs to be framed".  

To make this card I cut two sunflowers out, one flower center, and the leaves.  I did some ink blending on everything to make it more natural and interesting, then I stitched away and adhered everything together.  I did pop up the top sunflower and the brown center on dimensionals.  I used gold metallic floss on the flower and a light green floss on the leaves.  Everything was then glued to a blue patterned fall designer paper then I added a few fall gems and a stamped a fall sentiment.


Spellbinders had a huge sale recently, so I saw that as an opportune time to buy a couple of new dies. This die is called "Truckin' Through the Seasons".  I love this die for its versatility because it includes other items you can put in the truck bed like presents, Christmas trees, etc.  


To make this card I chose a pretty fall patterned designer paper and adhered the truck to the paper.  I decided to add a little fall poem about pumpkins to tie in with the pumpkins in the truck bed.  I stamped that on a piece of golden card stock then added some flowers and vines from the same die set.  Everything was then adhered to a gold foil card base.


I think these die cuts are a lot more work than simply stamping and coloring, so I don't understand why crafters like them so much.  I think it might be because people don't like to color, but I've become very skilled at coloring, so I enjoy it.  Every single piece you see in the truck below had to be cut in a different color, ink blended, then glue back together.  It's a long, pain-staking process in my opinion.


This next card was really hard as that tractor and all its veggies was a lot of small pieces, but I sure like the way it turned out.  It's a great card for a little boy and it can also be used for other seasons/events.  I can see filling the trailer with Christmas trees for the holidays and doing the tractor in red instead of green.  This die cut is called "Thankful Tractor" but I can't seem to find it on their website anymore so it must be sold out.


To make this card, I once again very painstakingly cut all the little pieces out of all the different colors of card stock, ink blended everything, then glued them back together.  The wheels were popped up on dimensionals,


Once everything was complete, I just glued it to some fall designer paper and adhered it all to a green card stock base.


I also made some fall tags for all their fall gift bags.  If you're wondering where Lazarus' card is, I didn't make him one because he is only five months old and I ran out of time.

The leaves were die cut with old Cuttlebug leaf dies then ink blended.  The tags were cut using a Spellbinder's tag die, and eyelets were installed in the holes of the tags


And here are all the little ones holding their fall cards.  I know, they look so thrilled 😆 I think they were just anxious to see what was inside their gift bags and I make them open up their cards and take a photo first.  Trust me, they do love the cards.  They even keep their favorites in little boxes and Alethea even keeps the unicorn shaker card I made for her birthday on display on her dresser.


And here you can see few photos of them being a little more excited opening their gift bags.

I always give them a new fall outfit.  They really do enjoy receiving new clothes.  The rest of the items in the bag are a few candy treats, some healthy snacks, and little toys/books.


This was the outfit I got for baby Lazarus.  Isn't it cute?  Brown is definitely this season's "it color".


And here is baby Lazarus wearing his new outfit.  Isn't he adorable?  I love his smile.  The sweater goes so well with his auburn hair.


The grandchildren love activity/sticker books.  They go through them so fast though!  They love them so much, when they get a new one they start working on it immediately and don't stop till it's finished.


Well I hope you enjoyed my fall cards and a little insight into my family.  There will be more fall stories to come in future travel posts.

Have A Great Day!  Amy

Linking Up with these Fabulous Blogs HERE!

Tuesday, October 24, 2023

Handmade Fall Cards

Every fall I love to send my grandchildren gift baskets and I always include a special handmade fall card made just for them. 

My first card I made for my oldest grandson Atticus.  I thought the little boy resembled Atticus so much.


To make this card I used a vintage stamp set from a retired company called "Crafty Secrets".  I managed to buy a lot of their stamp sets before the company went out of business knowing how hard these vintage images are to find.  

I created a scene by stamping grass on to plain white card stock.  The boy, the pumpkins, and the wagon are all popped up on dimensionals.  I stamped them, colored them in, then cut them out.  The sentiment, frog, and leaves are stamped directly on the card stock.


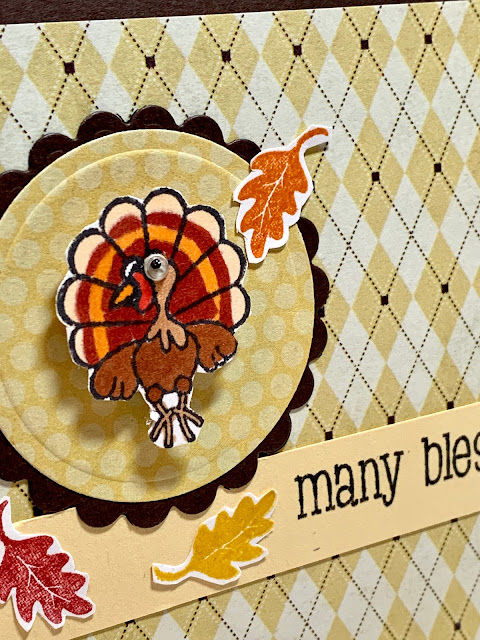
My next card went to my youngest grandson, Elisha.  For this one, I just glued a fall print onto brown card stock and adhered it to a white card base.  I cut a scalloped circle of brown card stock and a coordinating fall print using circle dies and a Cuttlebug machine.  The turkey was made with a stamp from the Dollar Bin at a fabric and craft store.


I cut a piece of tan solid card stock and stamped the sentiment onto that and glued it to the card.


I added google eyes to the turkey because I thought Elisha would get a kick out of that, then I added some fall leaves for embellishment.


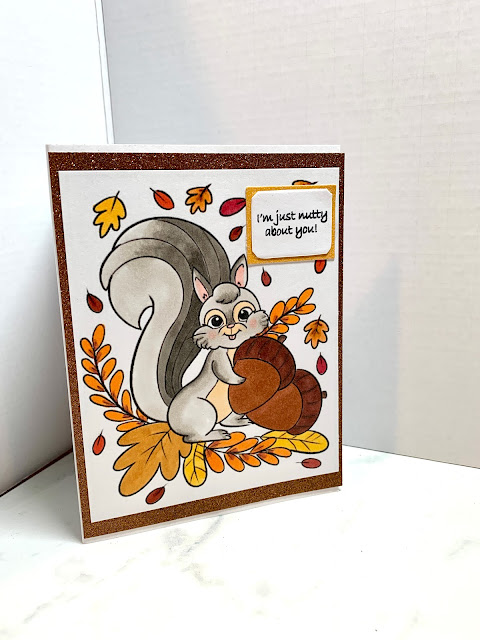
My final card was made for my granddaughter, Alethea.  This image was found on the Internet and I simply printed it onto white card stock and colored it in.  You can find so many cute images on the Internet for free, that one really doesn't need to purchase stamps anymore.


Because this card was made for a girl, I used brown sparkle card stock as a border.  The sentiment was from another stamp set.  I stamped that onto separate card stock, used a corner edger to get creative corners, then glued it to a piece of sparkly gold card stock.


 I hope you enjoyed my fall cards!

Have A Great Day!  Amy

Linking Up with these Fabulous Blogs HERE!

Tuesday, October 18, 2022

Handmade Fall Cards for My Grandchildren

There's nothing I like to make more than cute cards for my grandchildren.  This first one I gave to my grandson Atticus because I thought he'd love the adorable fox image.


I stamped the fox image separately, colored it in, and popped it up on dimensionals.  The leaves were cut using a die cutting machine.


The acorn was also stamped, colored and cut out separately, then glued to the page.  The circle panels were cut using Spellbinder's dies.  I cut one ordinary circle out of designer paper that coordinates with the background designer paper.  Then I cut a second circle, this one with scallops, out of olive green card stock.  The sentiment is a MFT die cut, and I cut it twice, once in white and once in rust, then I stamped a sentiment on it.


This is the card I made for my granddaughter.  I used a retired Crafty Secrets vintage fall image and lots of colorful, coordinating designer paper to make this card.


First, I colored image in using all fall colors, then I cut it out and layered it twice, once on purple paper, then on orange.  I used three different fall prints on this card, stamping the sentiment on the solid purple panel.  I then stamped a small leaf, colored it, fussy-cut it out, and glued it at the end of the sentiment.

For embellishments,  I added a couple of purple adhesive crystals to the far upper right corner of the card and a double, rustic bow above the sentiment.


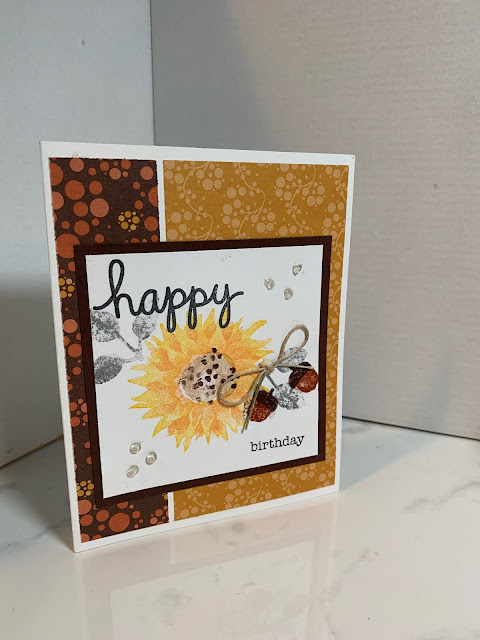
Finally, this was a card I didn't make but it was sent to me in celebration of my birthday.  Because my birthday lands in fall, the creator used fall images for my card.


I love how they tied a knot with rustic twine above the acorns.


Have a Great Day!  Amy

Linking up with these Fabulous Blogs HERE!


Tuesday, October 12, 2021

Two Handmade Fall Cards: One Simple, The Other Complicated

I have two very different fall cards to share with you today:  one is very simple and easy to make, and the other is very complicated and more time consuming.

First let's look at the simple one.  To make this card, I just used a pretty fall designer paper and then added a large fall sentiment.  The sentiment is an old stamp from Inkadinkado.  It's one of those "no color" stamps.  To get the fall color on the stamp, I had to color right on the stamp with an assortment of watercolor markers, then I stamped directly on the white card stock panel and wa-la!  I had my main image colored and done.


I added the sentiment panel to a piece of rusty orange card stock after I cut a scalloped edge using a MFT die.  Then everything was just assembled upon a white card base.

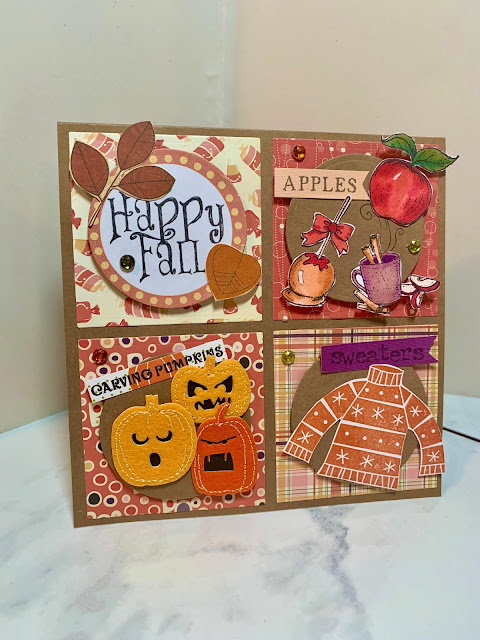
For my next card, the "complicated" one, I used stamps and stickers from a lot of different sets.  I wanted to show fun little scenes of fall in every square.  I have to say I did get this idea from Wanda, but I changed it up using the supplies I already owned.  

The card is divided into four squares.  Each square uses a different piece of designer paper.  I put the main sentiment in the top left square because the eye reads left to right.

It's a very large, square card, I think 6 x 6.  I used a piece of Kraft card stock for the base.  In some spots I used dimensionals to pop the elements out.  The pumpkins are felt stickers and the sentiment above them was just cut out from the designer paper.  The rest of the sentiments are stamps and cut out with MFT dies.  Finally, I added some fall colored gems for embellishment.  Is this a fun card or what?  It was a lot of work, but I sure enjoyed making it. 


 Have A Great Day!  Amy

Linking Up with these Fabulous Blogs HERE!

Tuesday, November 19, 2019

A Thanksgiving Card For A Little Boy

This past month I have been showing all the Thanksgiving cards I made for my family.  Today I have one more to share, my last one, the card I made for my beautiful grandson.


All the stamps were found in the dollar bins of a local craft store.  I stamped the main image, sentiment, and leaves directly on the main image image panel and colored them in with Copic markers.  The pumpkin and nut were stamped on a separate piece of card stock, colored in, cut out, then popped up on dimensionally.  I covered the pumpkins in Crystal Effects to make it shiny.


I stamped some grass under the fox.  Scrap ribbon from my stash was added to the upper left corner for some extra embellishment.  I adhered a leaf brad over the top to secure the ribbon in place.


I adhered the main image panel to a copper glitter panel, then I glued the two panels to an orange card base.

And here is the latest picture of the sweet little boy that received this card.  Babies change so quickly I thought you'd like to see a recent picture.  He still has the sweetest, most chill temperament.  I can't wait to see him and Alethea this Thanksgiving.


Have A Great Day! Amy

Linking Up with these Fabulous Blogs HERE!


Tuesday, November 12, 2019

A Thanksgiving Card For A Little Girl

The past couple of weeks I've been showing the fall/Thanksgiving cards I made for my kids.  I showed adult cards the first two weeks, now I'm moving on to the cards I made for my beautiful grandchildren.  This week I have a card I made for a little girl, my granddaughter, Alethea.


My image is an old MFT stamp.  I colored her in with Copic markers using all fall colors.  I made her a blond because Alethea is a blond.  Then I added some pretty leaf crystals because I knew Alethea would like that.


The sentiment was stamped directly on the main image panel then I adhered the panel to an orange card base.


Alethea was so cute when she got her card.  After she opened and looked at it, she immediately knew to put it on top of the bookshelf where it would stay safe but she could still see it.  Mom has her trained well. :)

Have a Great Day!  Amy

Linking Up with these Fabulous Blogs HERE

Tuesday, November 5, 2019

A Sunflower Thankfulness Card

In last week's craft post I shared the fall card I made for my son, this week I have the card that I gave to my daughter and son-in-law.


The image is from an old Flourish's set called "Sunflowers".  I colored it in with Copic Markers then I put Stickles in the flower center and Crystal Effects on the lady bugs to make them shiny.


I matted the main image card base twice to bring out the colors in the card.


Have A Great Day!  Amy

Linking Up with these Fabulous Blogs HERE!

Tuesday, October 29, 2019

A Handmade Fall Card “Fall Leaves”

This is a pre-scheduled post.  I am in Illinois helping my daughter with the grandchildren.  They do not have Internet service so I will not be able to respond to comments or visit your blogs until I return.

I am going to take a brief break from Bible Journal pages for the next few weeks so I can show you the fall cards I made for my family.  I don't make Halloween cards anymore, but I still love to give my kids and grandkids a holiday card and some treats, so I make fall cards instead.  

This card I made for my son.  I kept it as masculine as possible by using a plaid background in fall colors and leaf stamps.


All the stamps are old.  I really don't see the need to buy new fall stamps every years, so I just keep using the ones I have.  The sentiment is an old Inkadinkado sold stamp.  I colored the stamp with water markers to get the different colors in the image.  The leaves are from an old Stampin' Up! set.  I stamped them in a ink pad that has several different shades of ink in one pad.

I wrapped raffia around the main image panel and tied in a bow then secured a leaf brad on top.  The entire main image panel was popped up on dimensionals.


I matted the card three times before securing it to a white card base:  the plaid designer paper, the solid peach, and the solid brown.  The ovals was matted over the same brown card stock.


Have A Great Day!  Amy

Linking Up with these Fabulous Blogs HERE!

Tuesday, November 13, 2018

Fall Harvest Card

I have one more fall card to share with you before we move into the holiday season.  This is a fall card I made for my daughter and her husband.  I used a very old set from Stampin' Up!  called "Feathered Friends".  I actually sold this stamp set, but I stamped off a few images before I sent it on it's merry way to its' new owner;  and, I'm glad I did, because it is a classic!


I colored the image and cut it out with square Nestabilities from Spellbinders.  I added lots of embellishment to this card since it was such a tiny image.  I used Prima flowers, a brad for the flower center, and some hemp cord for a bow.


On the lower right corner I added another Prima flower and brad, but this time I cut out a leafy stem using an MFT die and I added a couple of shiny red apple brads.


The designer paper is from an old DCWV fall mat stack.  I created lots of frames and layers by matting it multiple times.


Have A Great Day!  Amy

Linking Up with these Fabulous Blogs HERE!